Create Private Subnet
Create Private Subnet
- Click Subnets.
- Click Create subnet.

- At the Create subnet page.
- In the VPC ID section, click labVPC01.
- Click on Add new subnet.

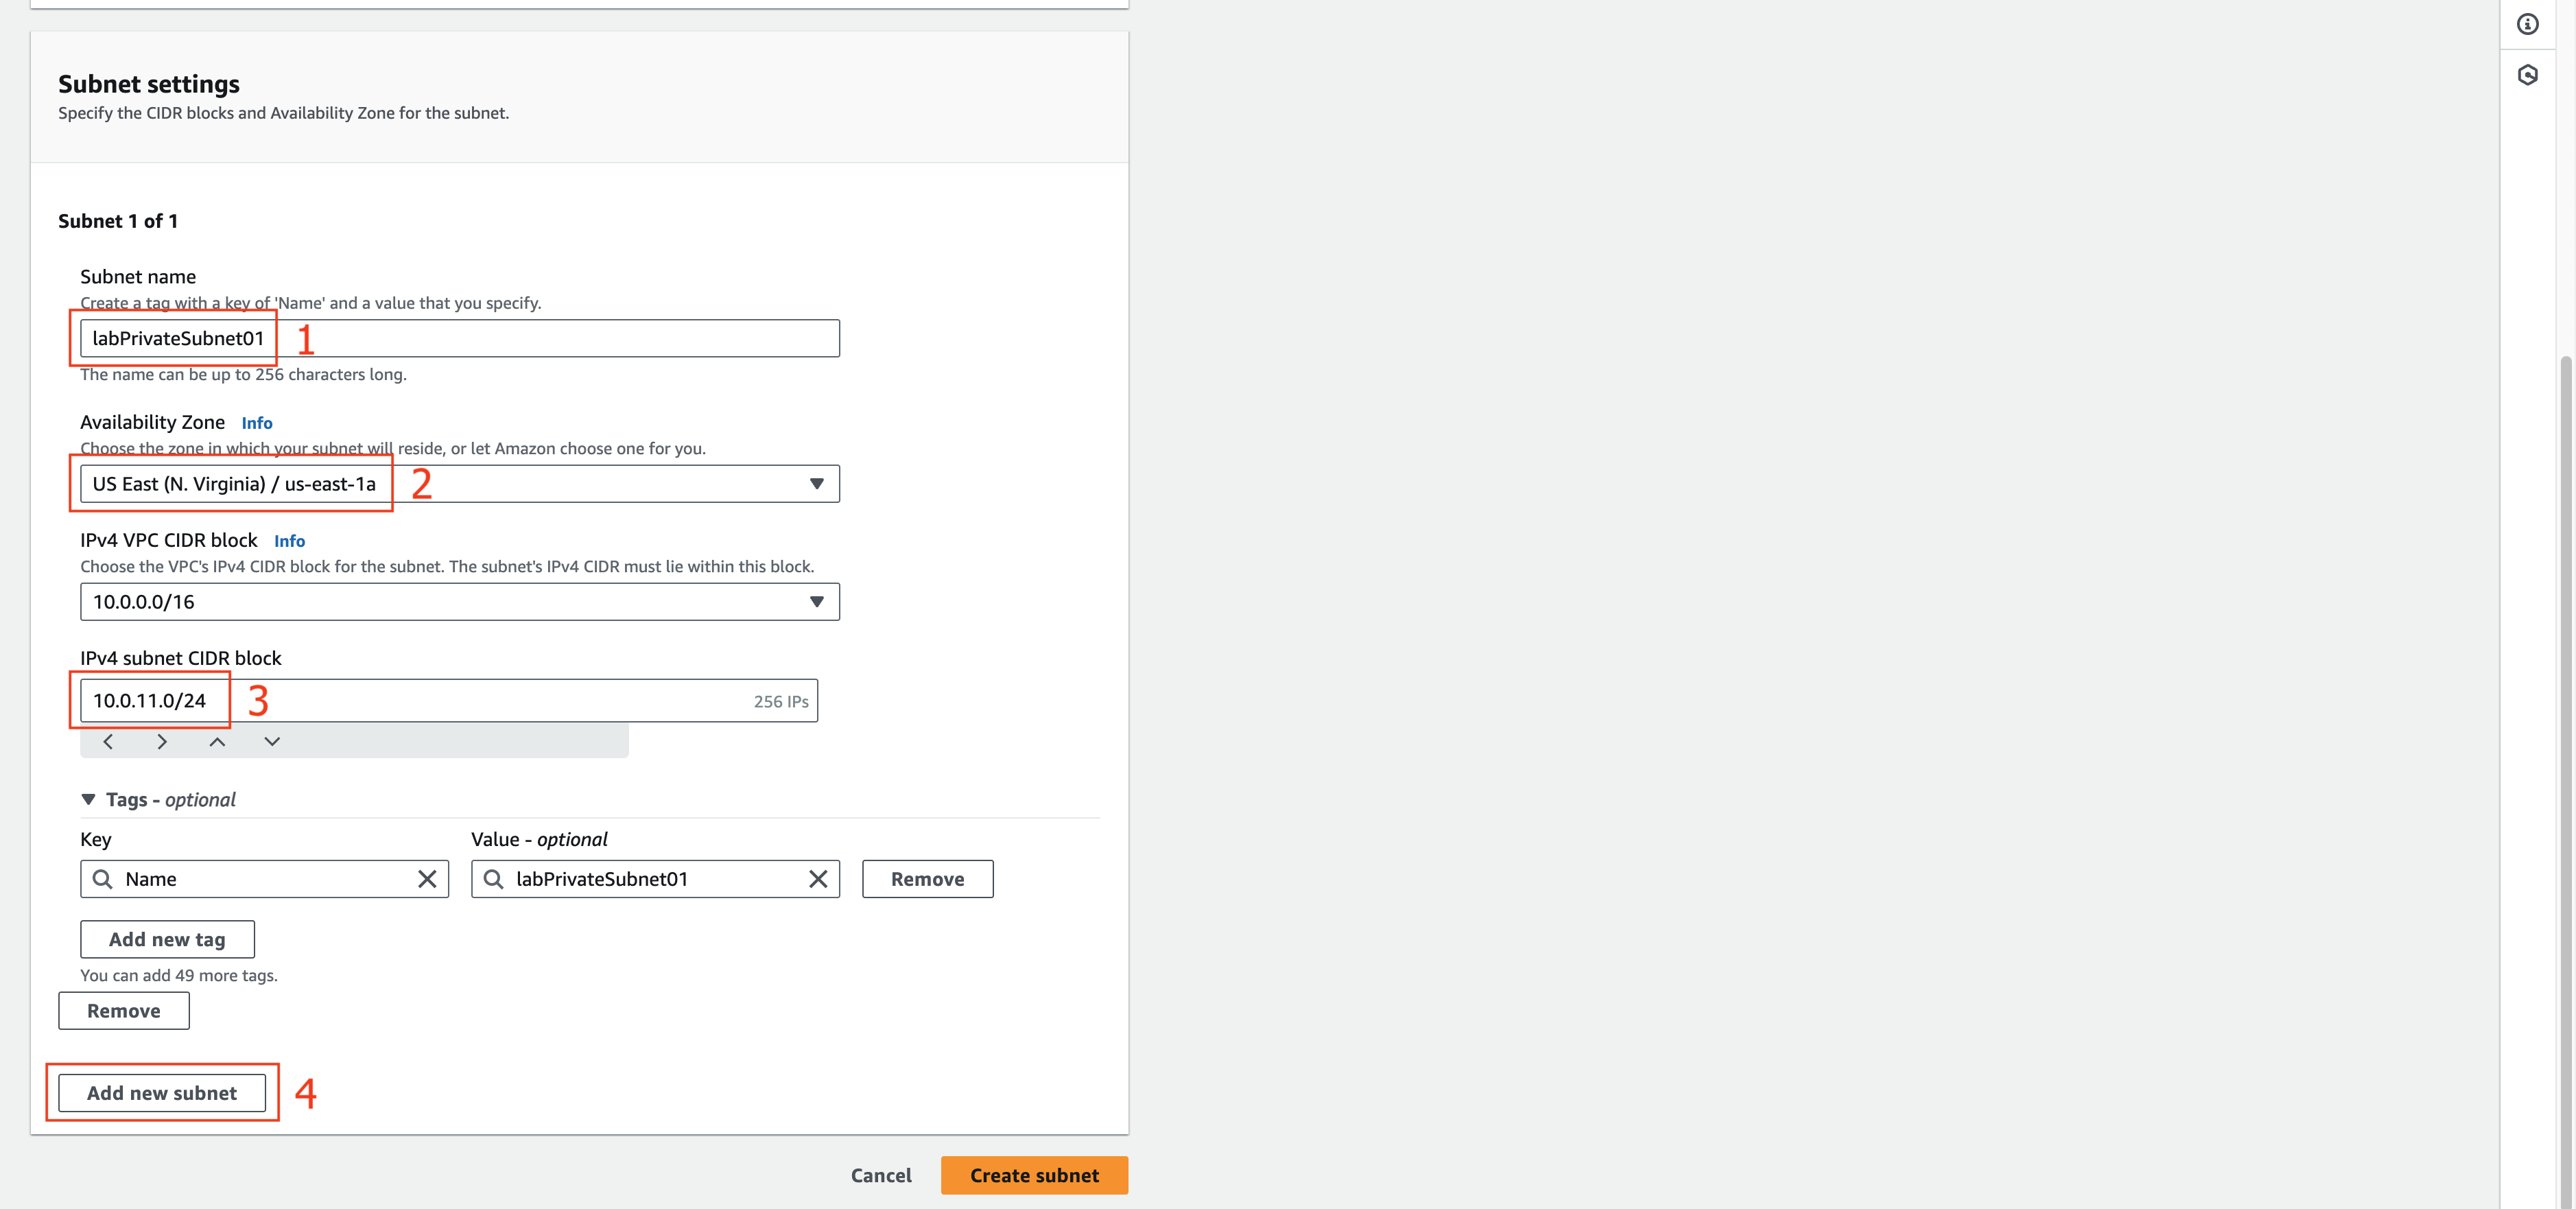
- At the Subnet 1 of 1 section.
- In the Subnet name field, enter labPrivateSubnet01.
- In the Availability Zone section, select the US EAST (N. Virginia) / us-east-1a.
- In the field IPv4 CIDR block enter 10.0.11.0/24.
- Click Add new subnet.

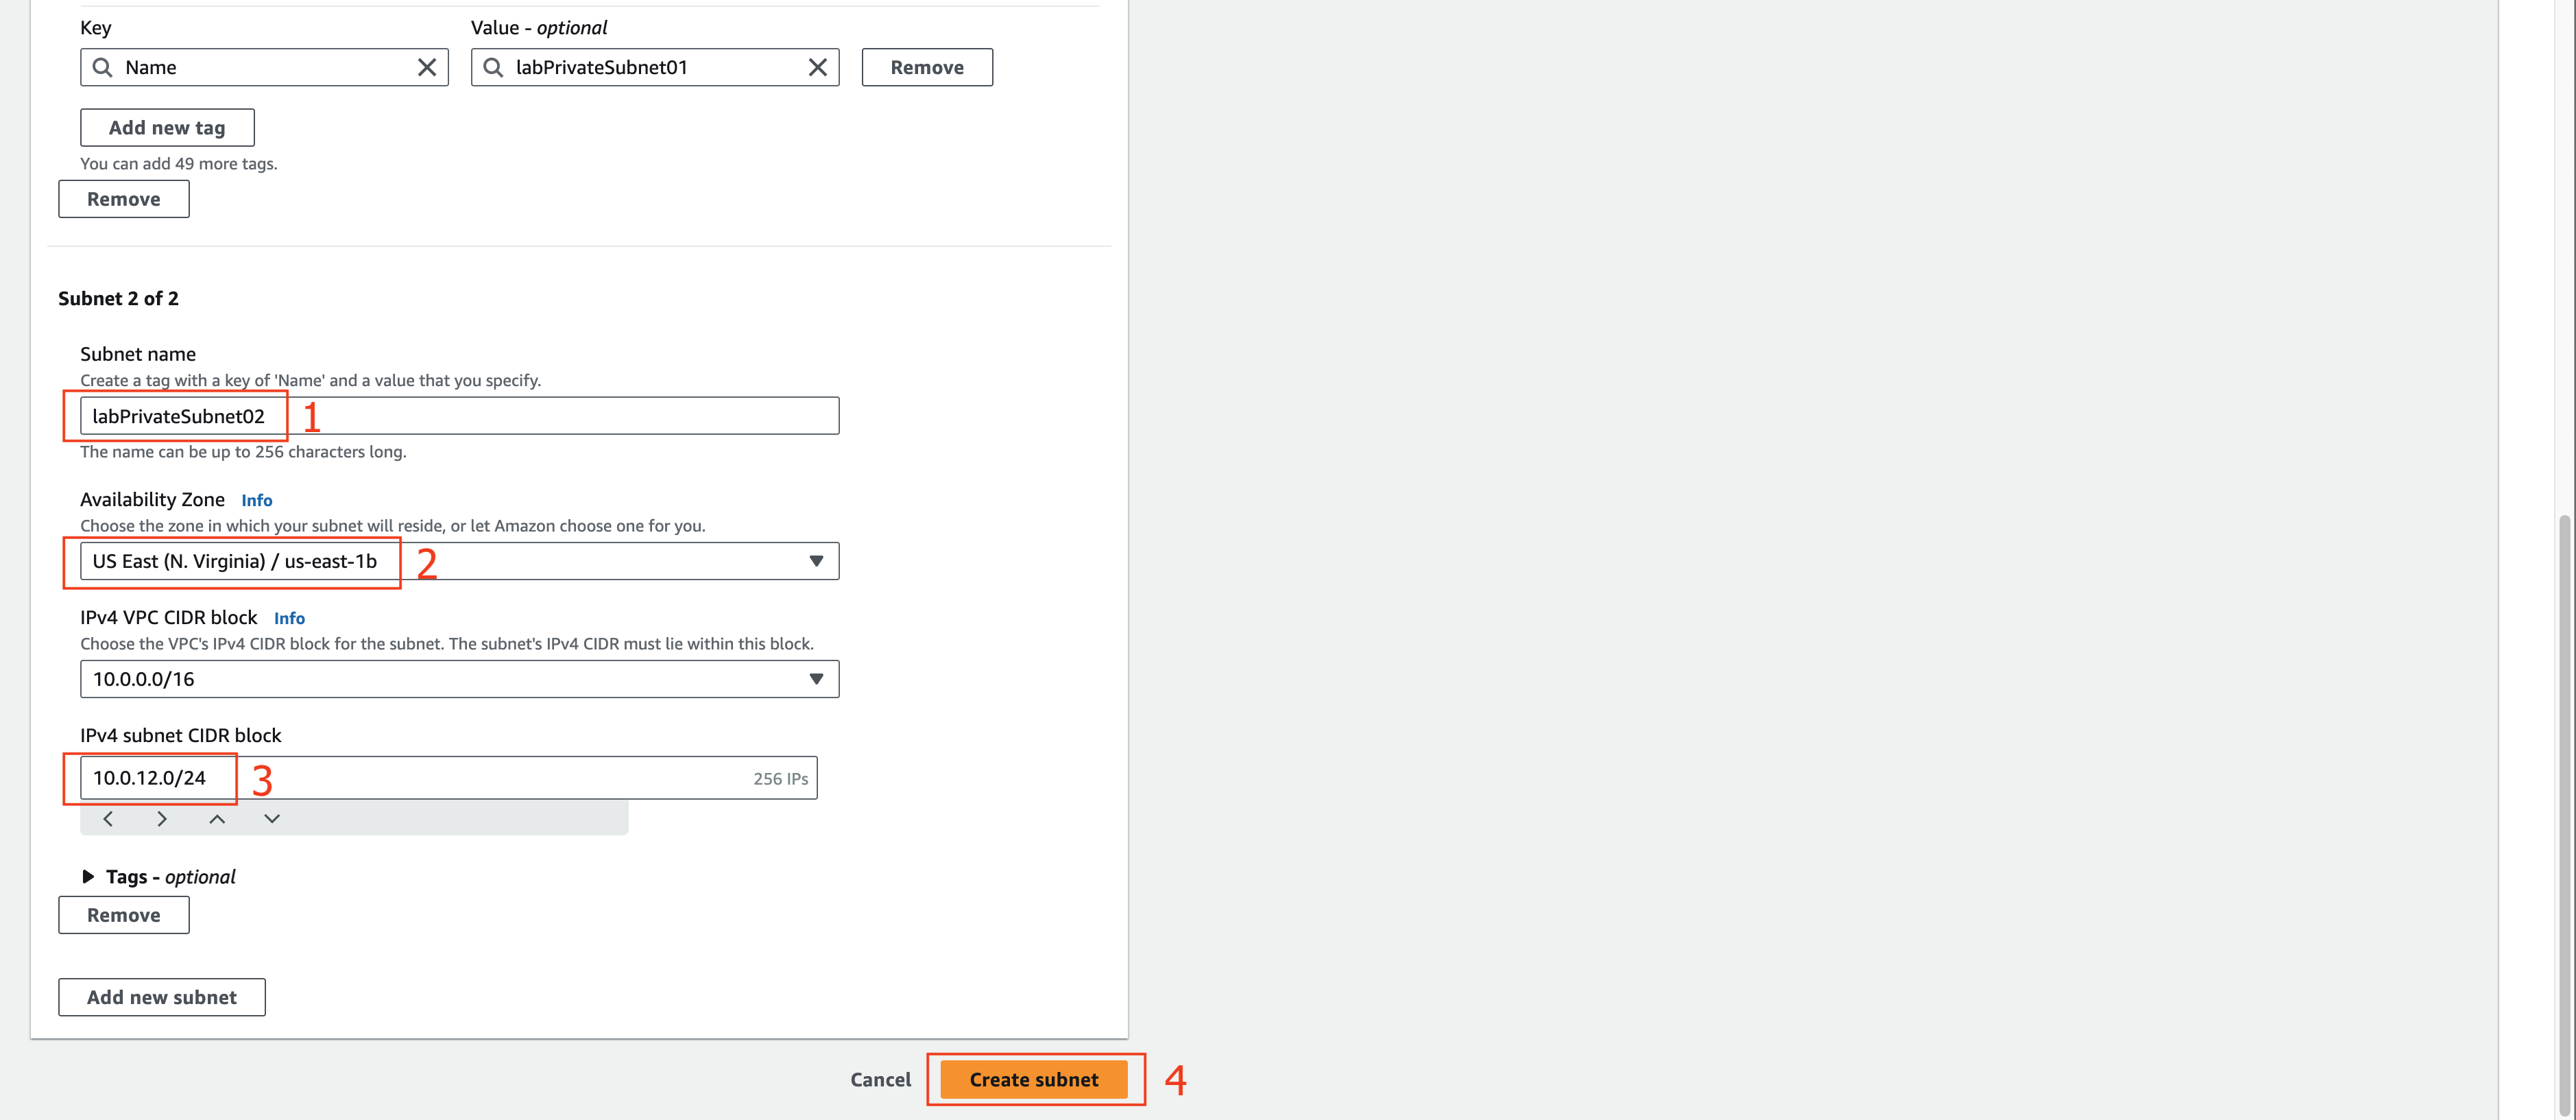
- At the Subnet 2 of 2 section.
- In the Subnet name field, enter labPrivateSubnet02.
- In the Availability Zone section, select the US EAST (N. Virginia) / us-east-1b.
- In the field IPv4 CIDR block enter 10.0.12.0/24.
- Click Create subnet.

- At the VPC dashboard.
- Click NAT gateways.
- Click Create NAT gateway button.

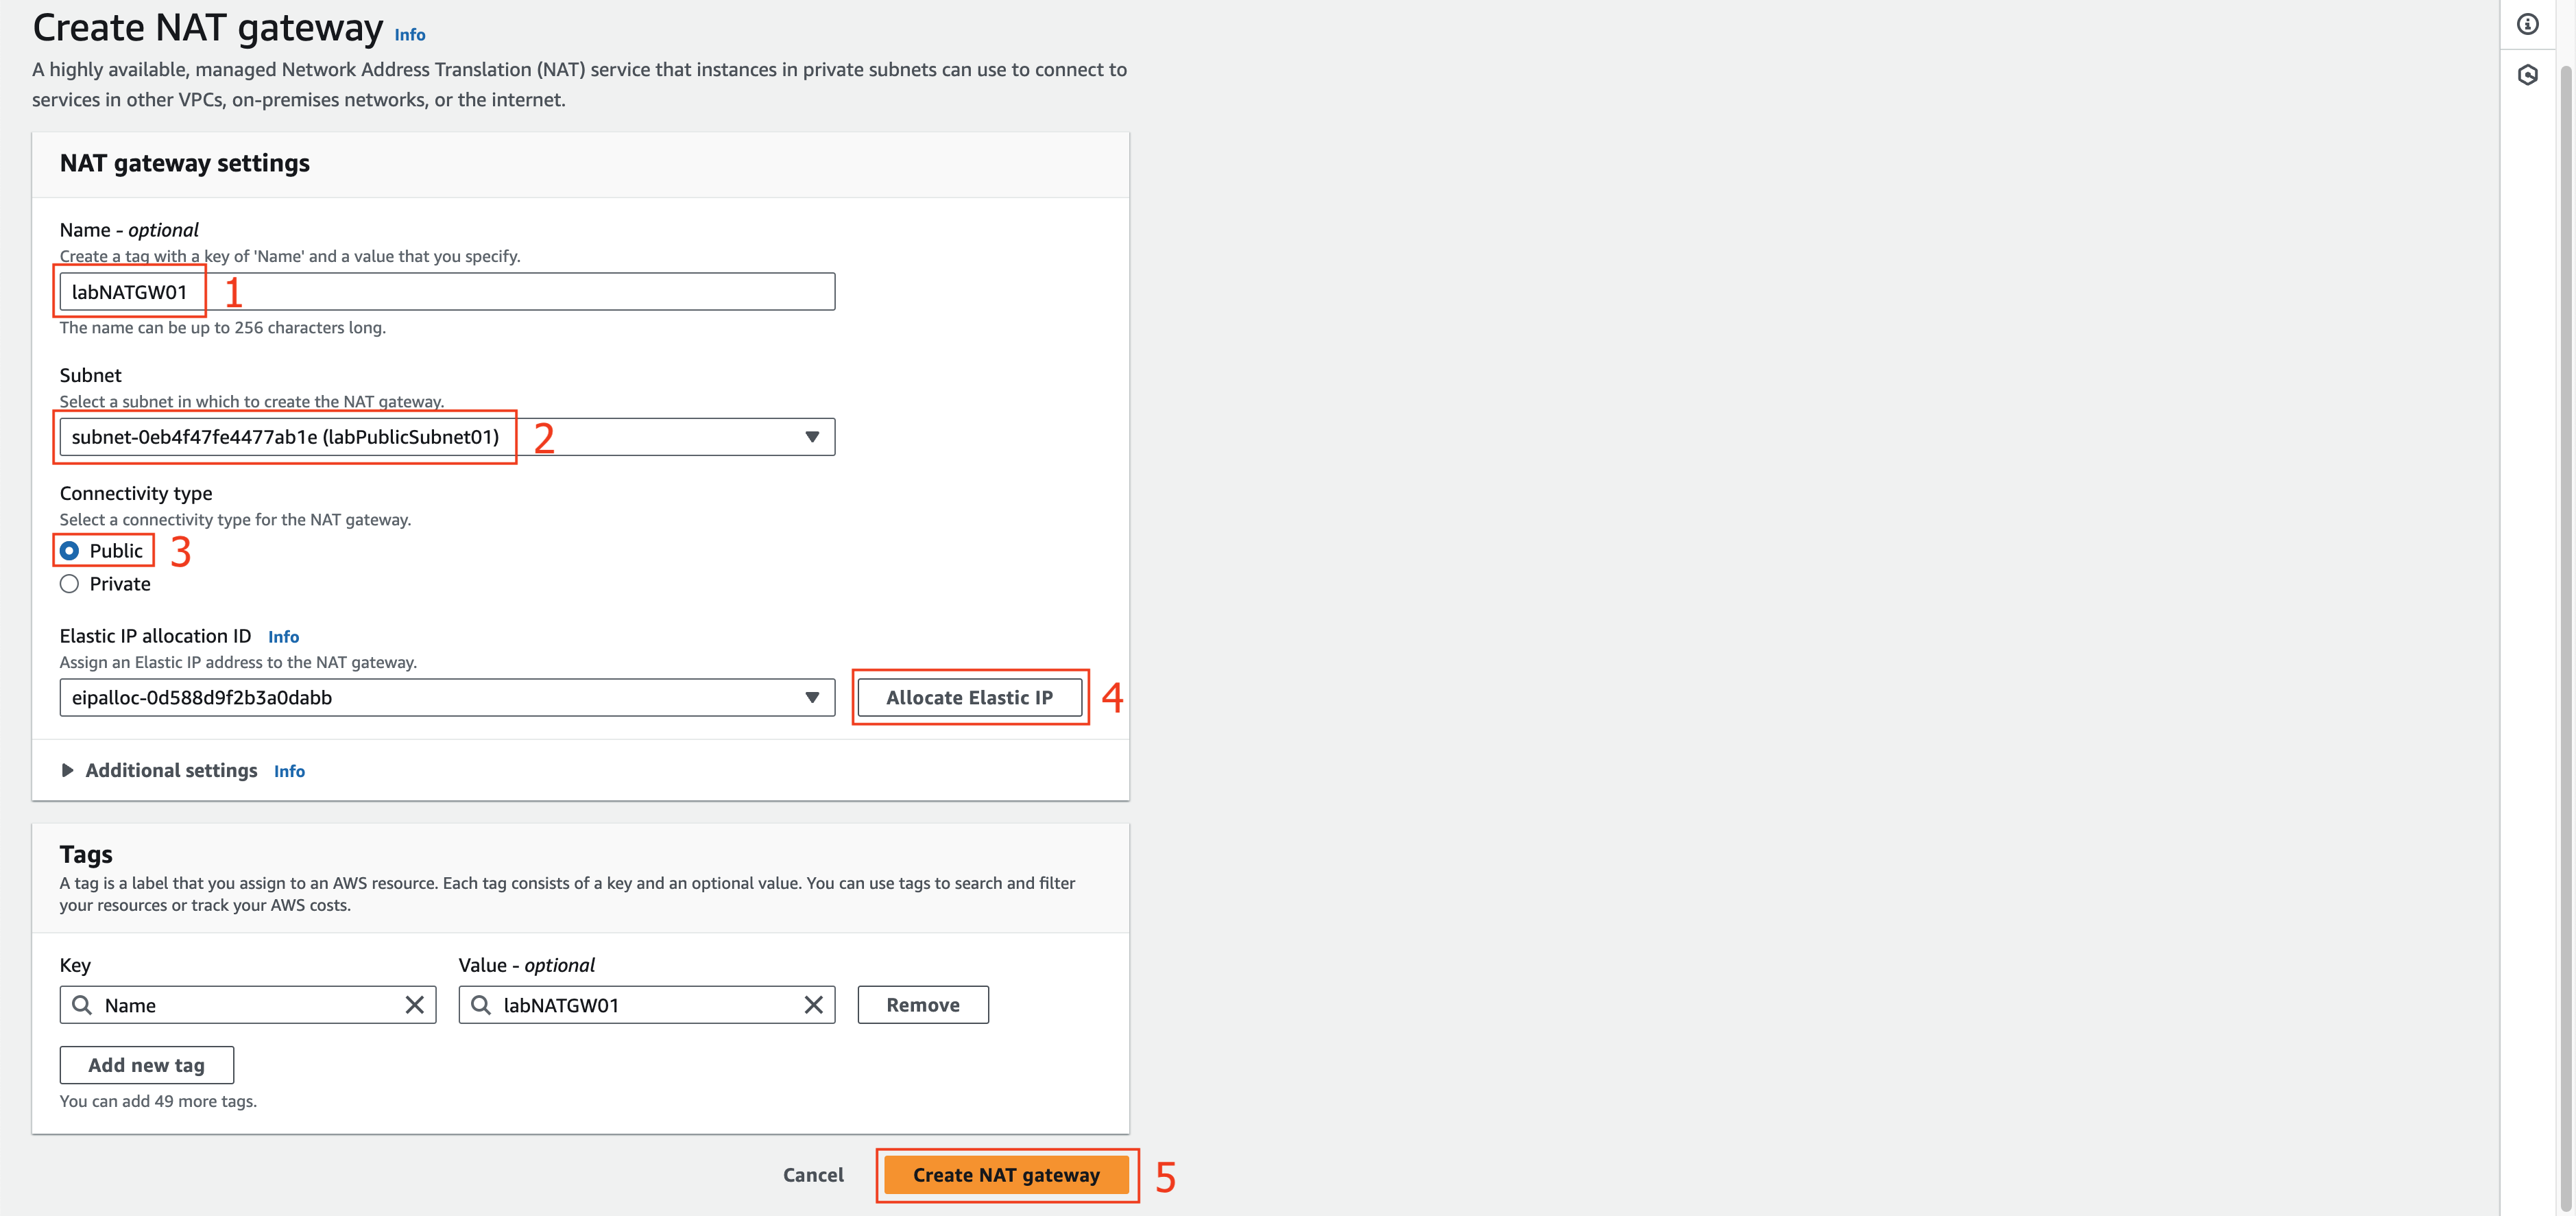
- At the Create NAT gateway page.
- Enter labNATGW01 value at Name field.
- Choose labPublicSubnet01 subnet.
- Choose Public Connectivity type.
- Click Allocate Elastic IP at Elastic IP allocation ID field.
- Click Create NAT gateway.

- At the VPC dashboard.
- Click Route tables.
- Click Create route table button.

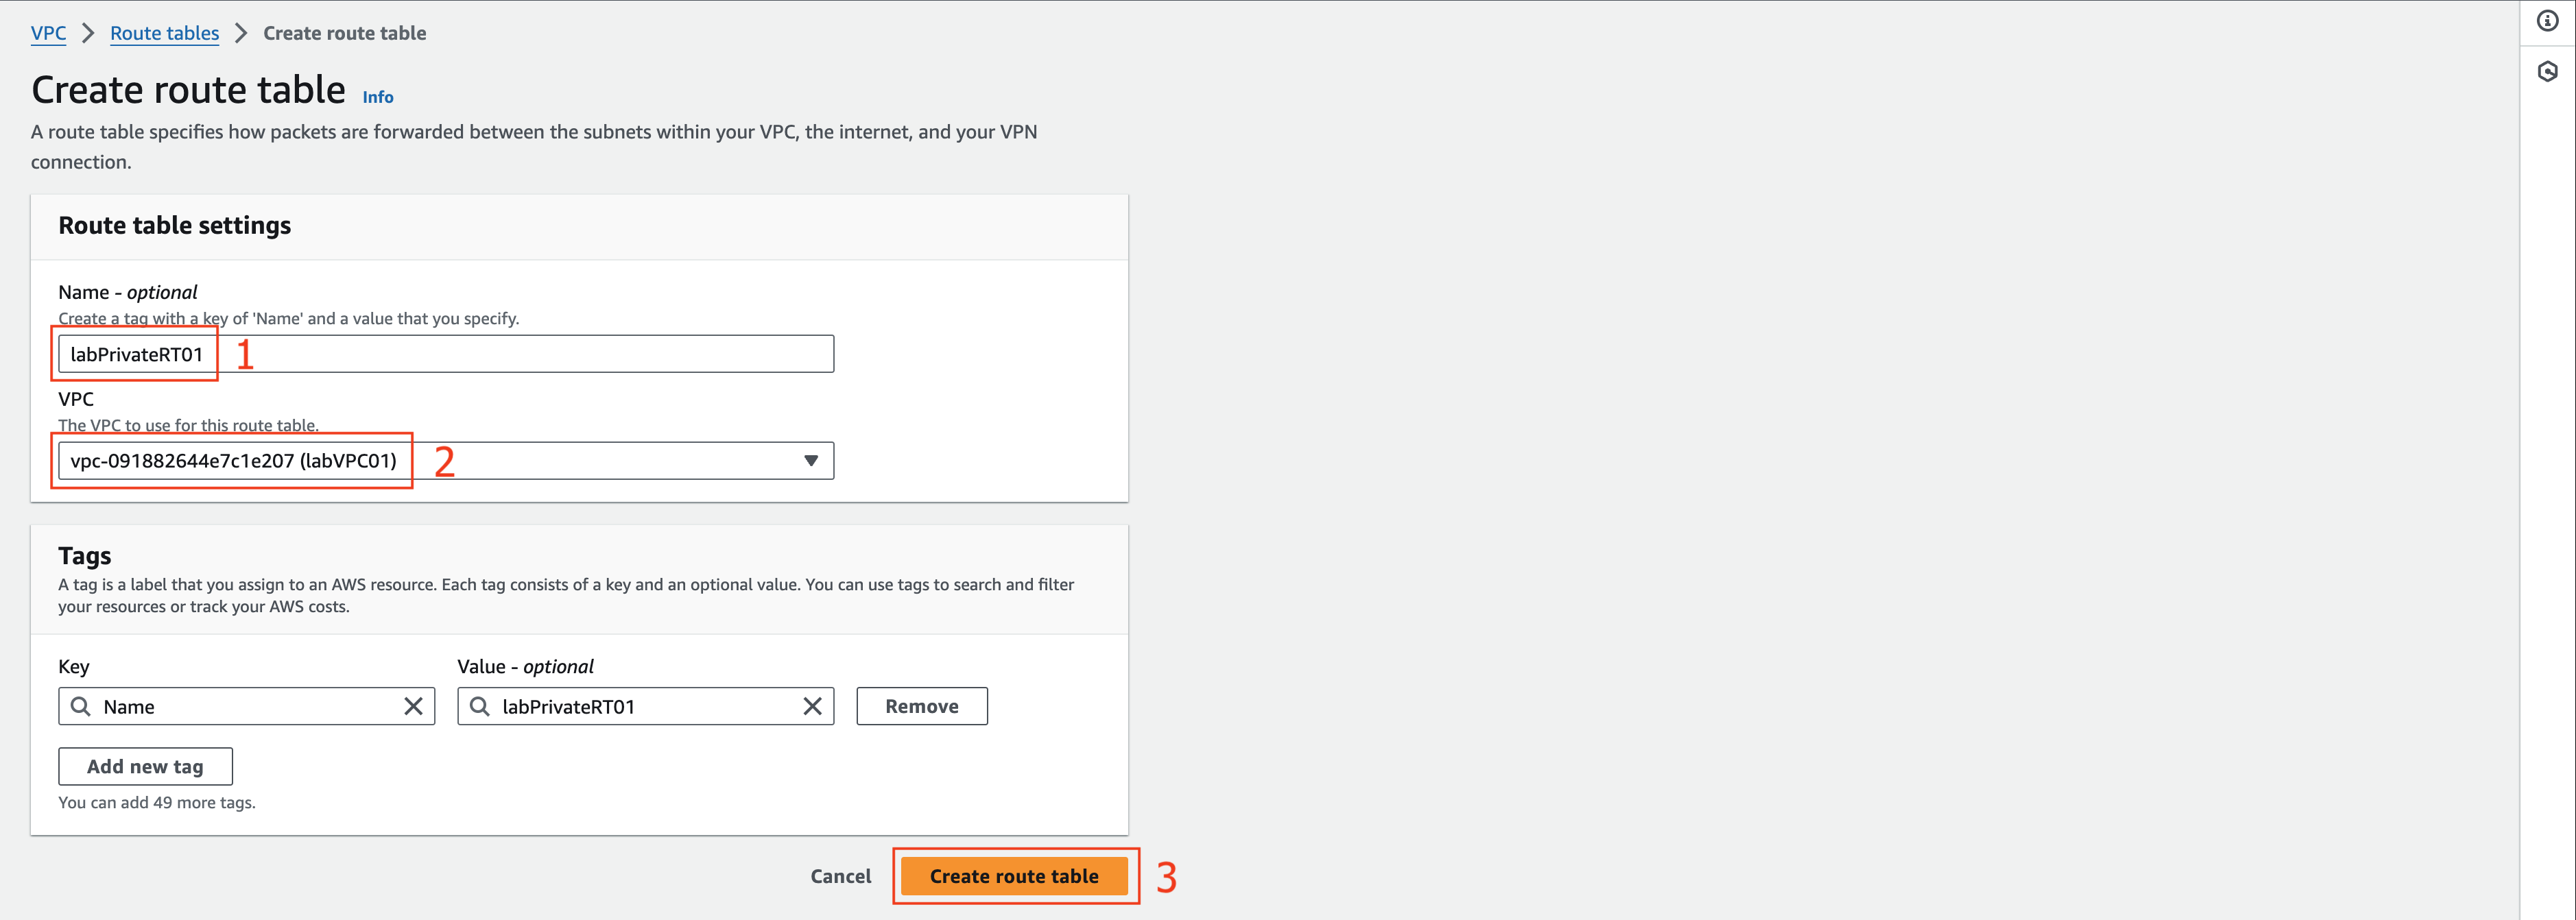
- At the Create route table page.
- Enter labPrivateRT01 at Name field.
- Choose labVPC01 at VPC field.
- Click Create route table.

- At the labPrivateRT01 page.
- Choose Subnets associations tab.
- Click Edit subnets associations.

- At the Edit subnet associations page.
- Choose labPrivateSubnet01 and labPrivateSubnet02.
- Click Save associations.

- At the labPrivateRT01 page.
- Choose Routes tab.
- Click Edit routes.

- At the Edit routes page.
- Click Add route.
- Choose 0.0.0.0/0 at Destination field.
- Choose NAT gateway and click on the NAT gateway created before.
- Click Save changes.

The next step is to create the necessary security groups for the lab.