Create Public instance
- Click Instances.
- Click Launch instances.

- At the Name and tags section.
- Fill the Name field with labBastionHost01 value.
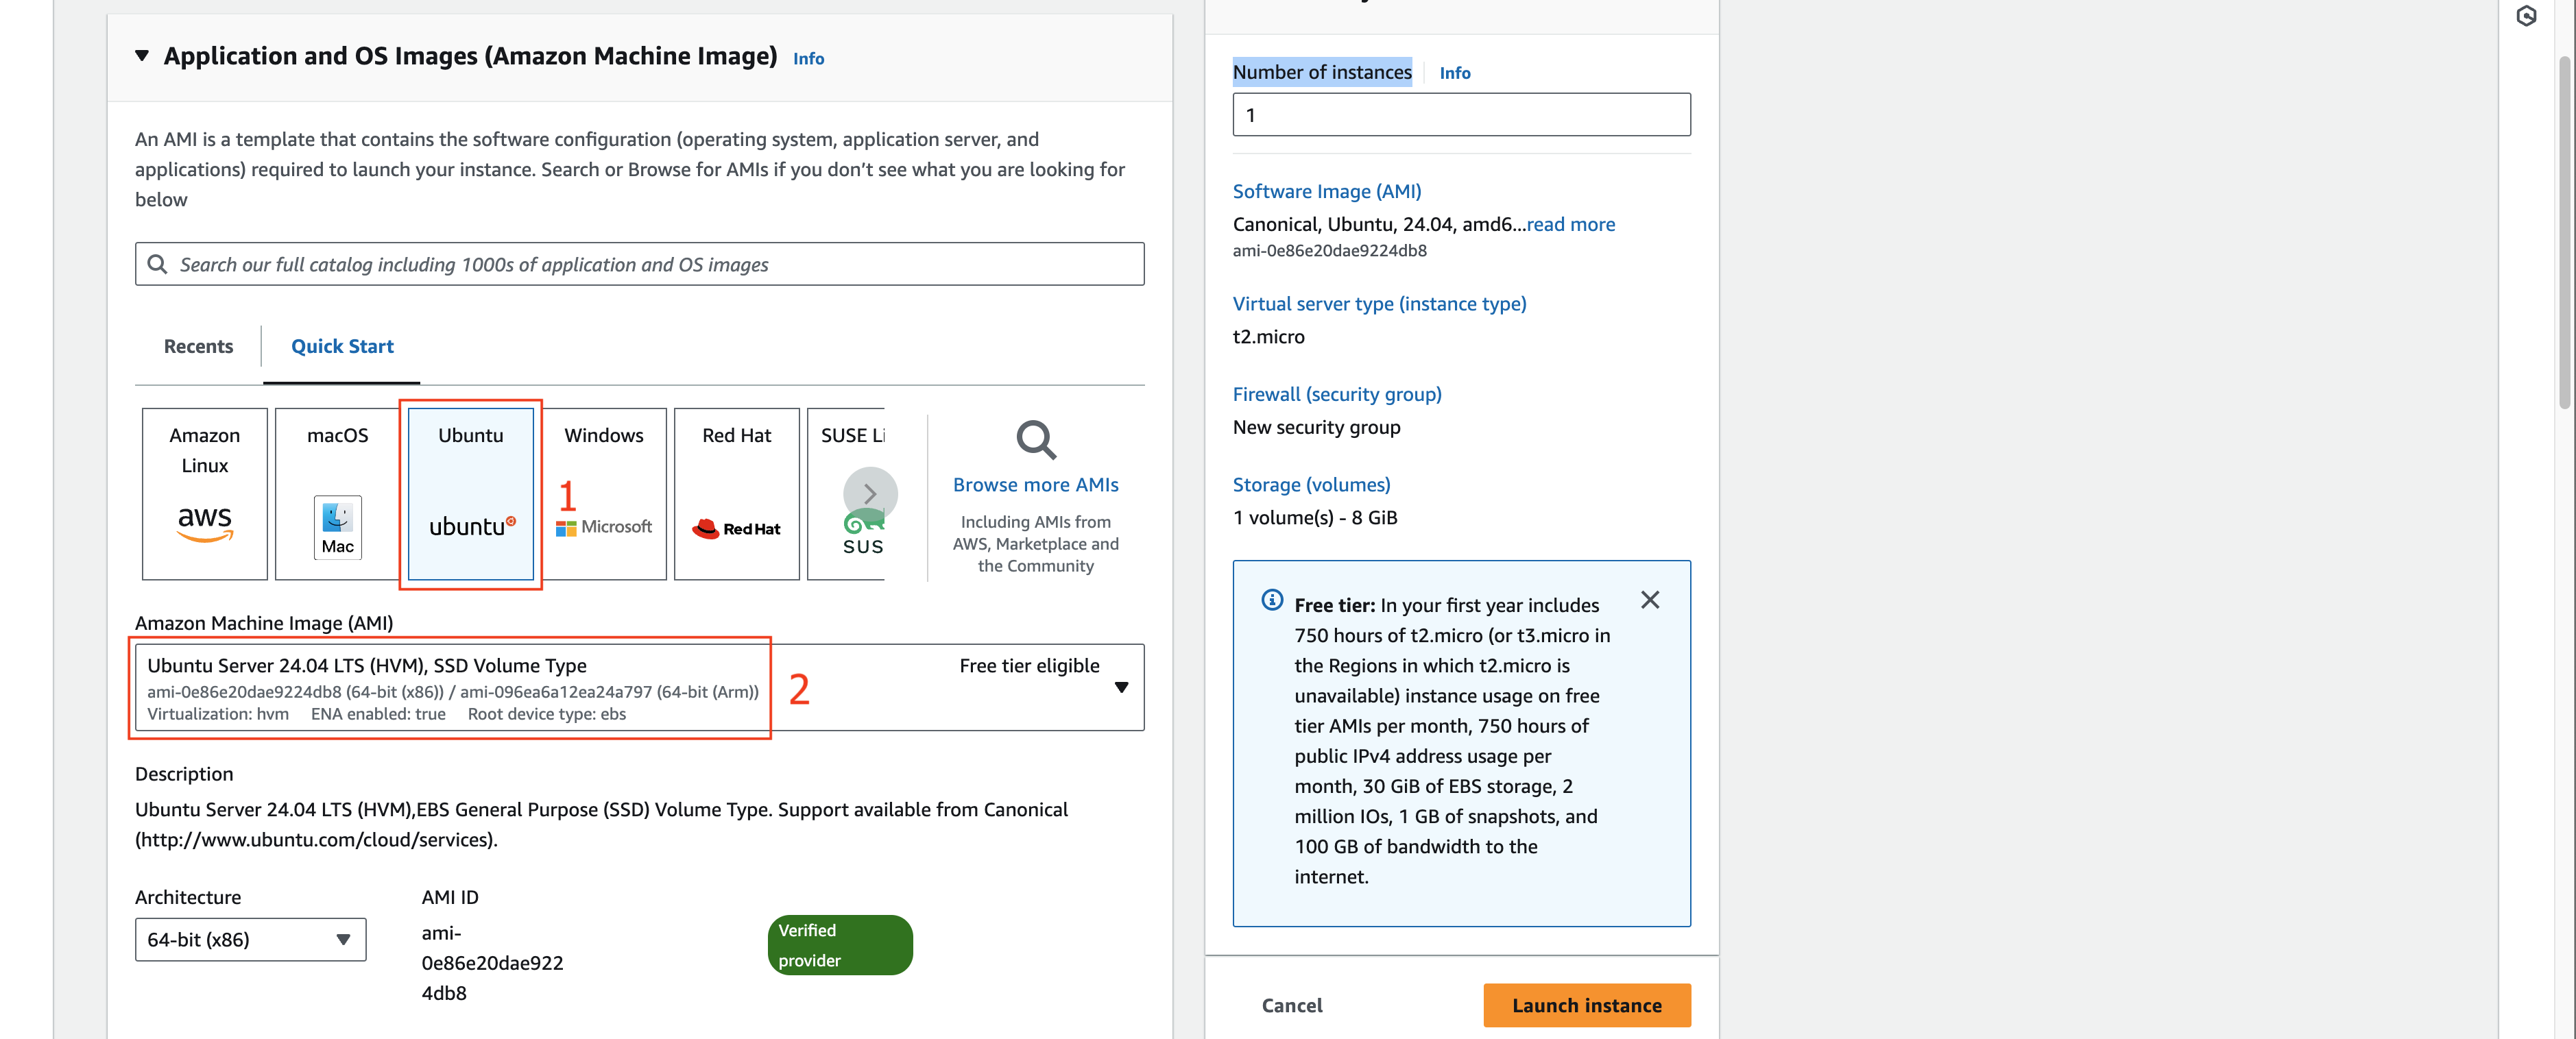
- Fill the Number of instances with 1 value.

- At the Application and OS Images (Amazon Machine Image) section.
- Click on Instance type Ubuntu.
- Choose Ubuntu Server 24.04 LTS (HVM), SSD Volume Type on Amazon Machine Image (AMI) field.
- Leave the rest as default.

- At the Instance type section.
- Choose t2.micro Instance type.

- At the Key pair (login) section.
- Click on the Create new key pair.

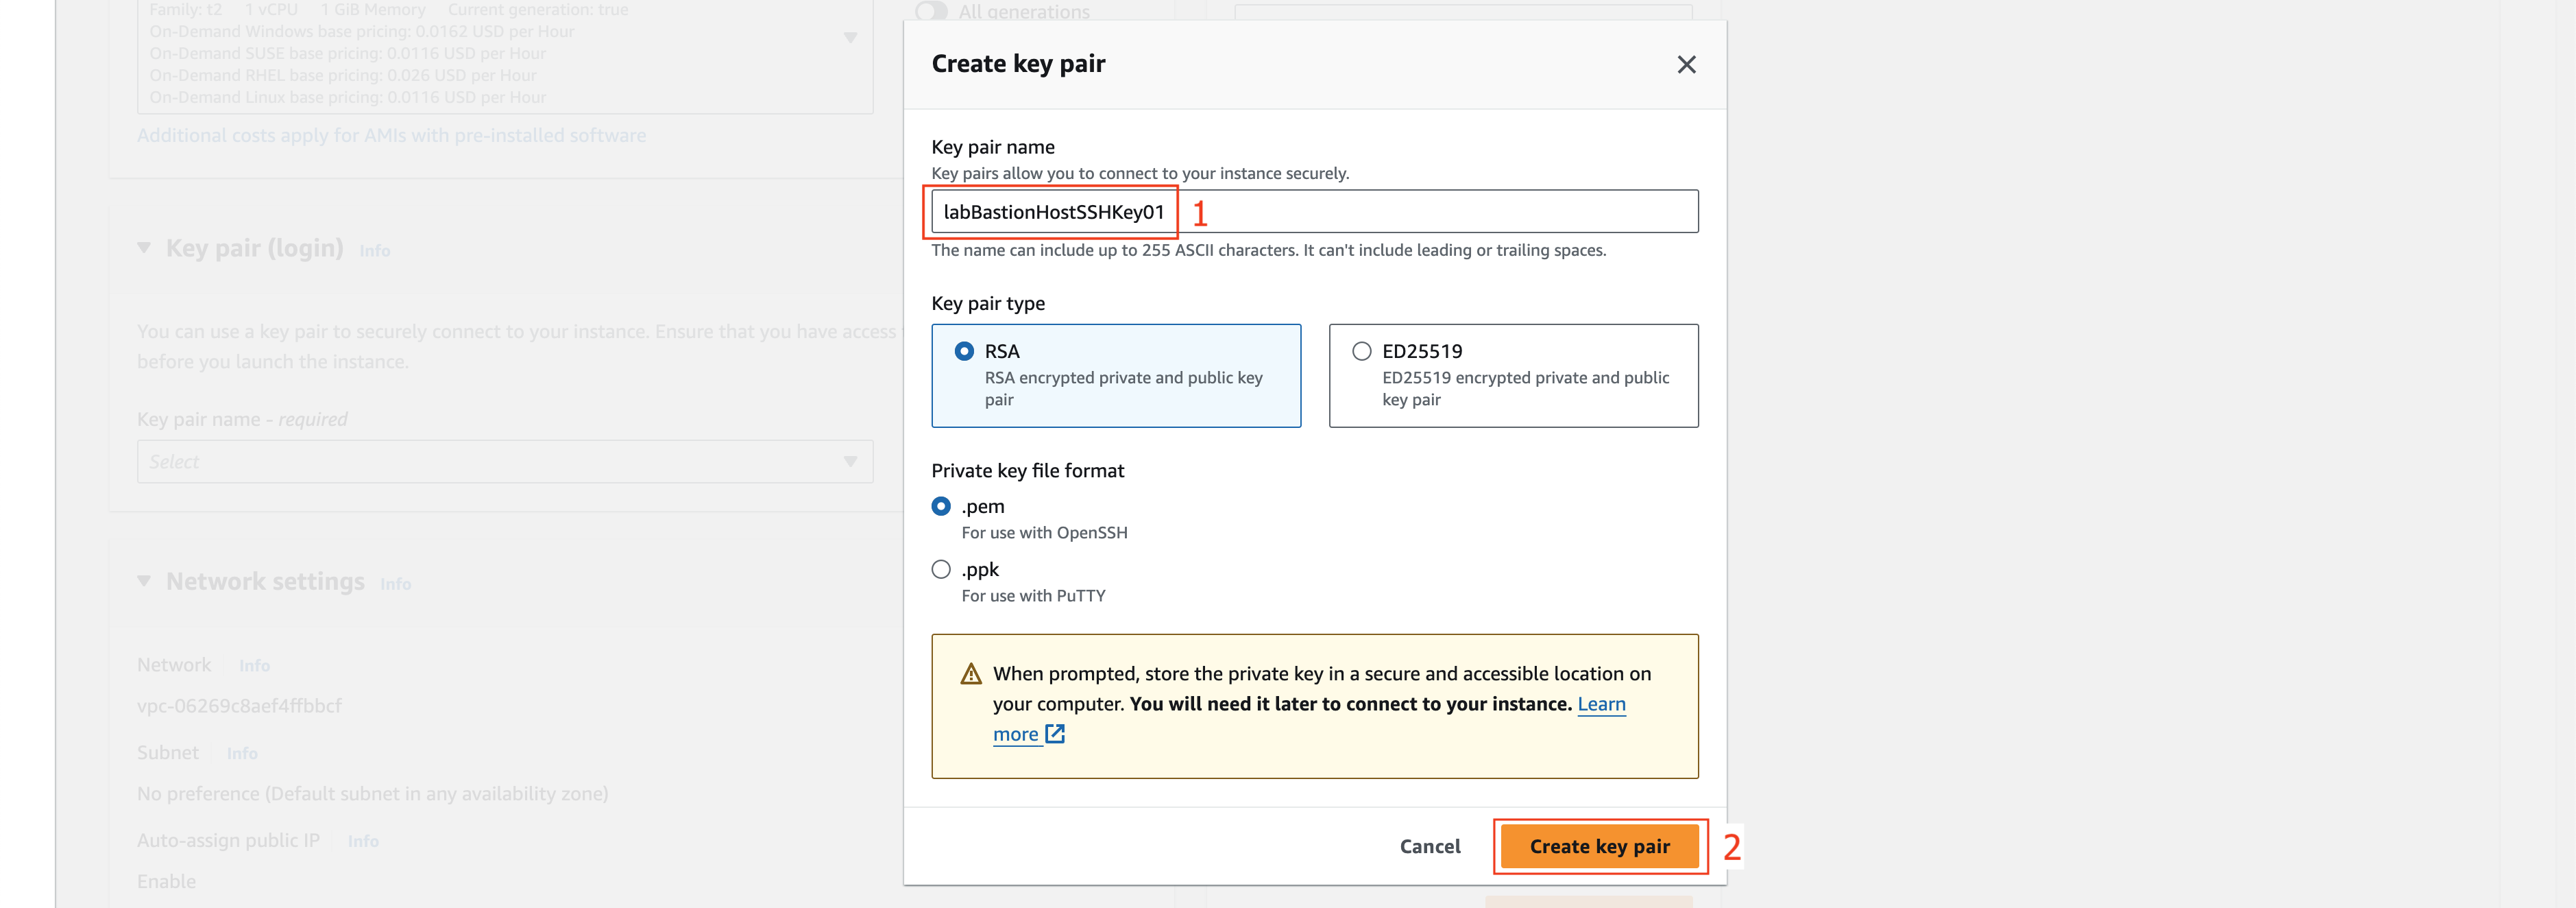
- At the Create key pair popup.
- Fill the Key pair name field with labBastionHostSSHKey01 value.
- Leave the rest as default.
- Click Create key pair button.

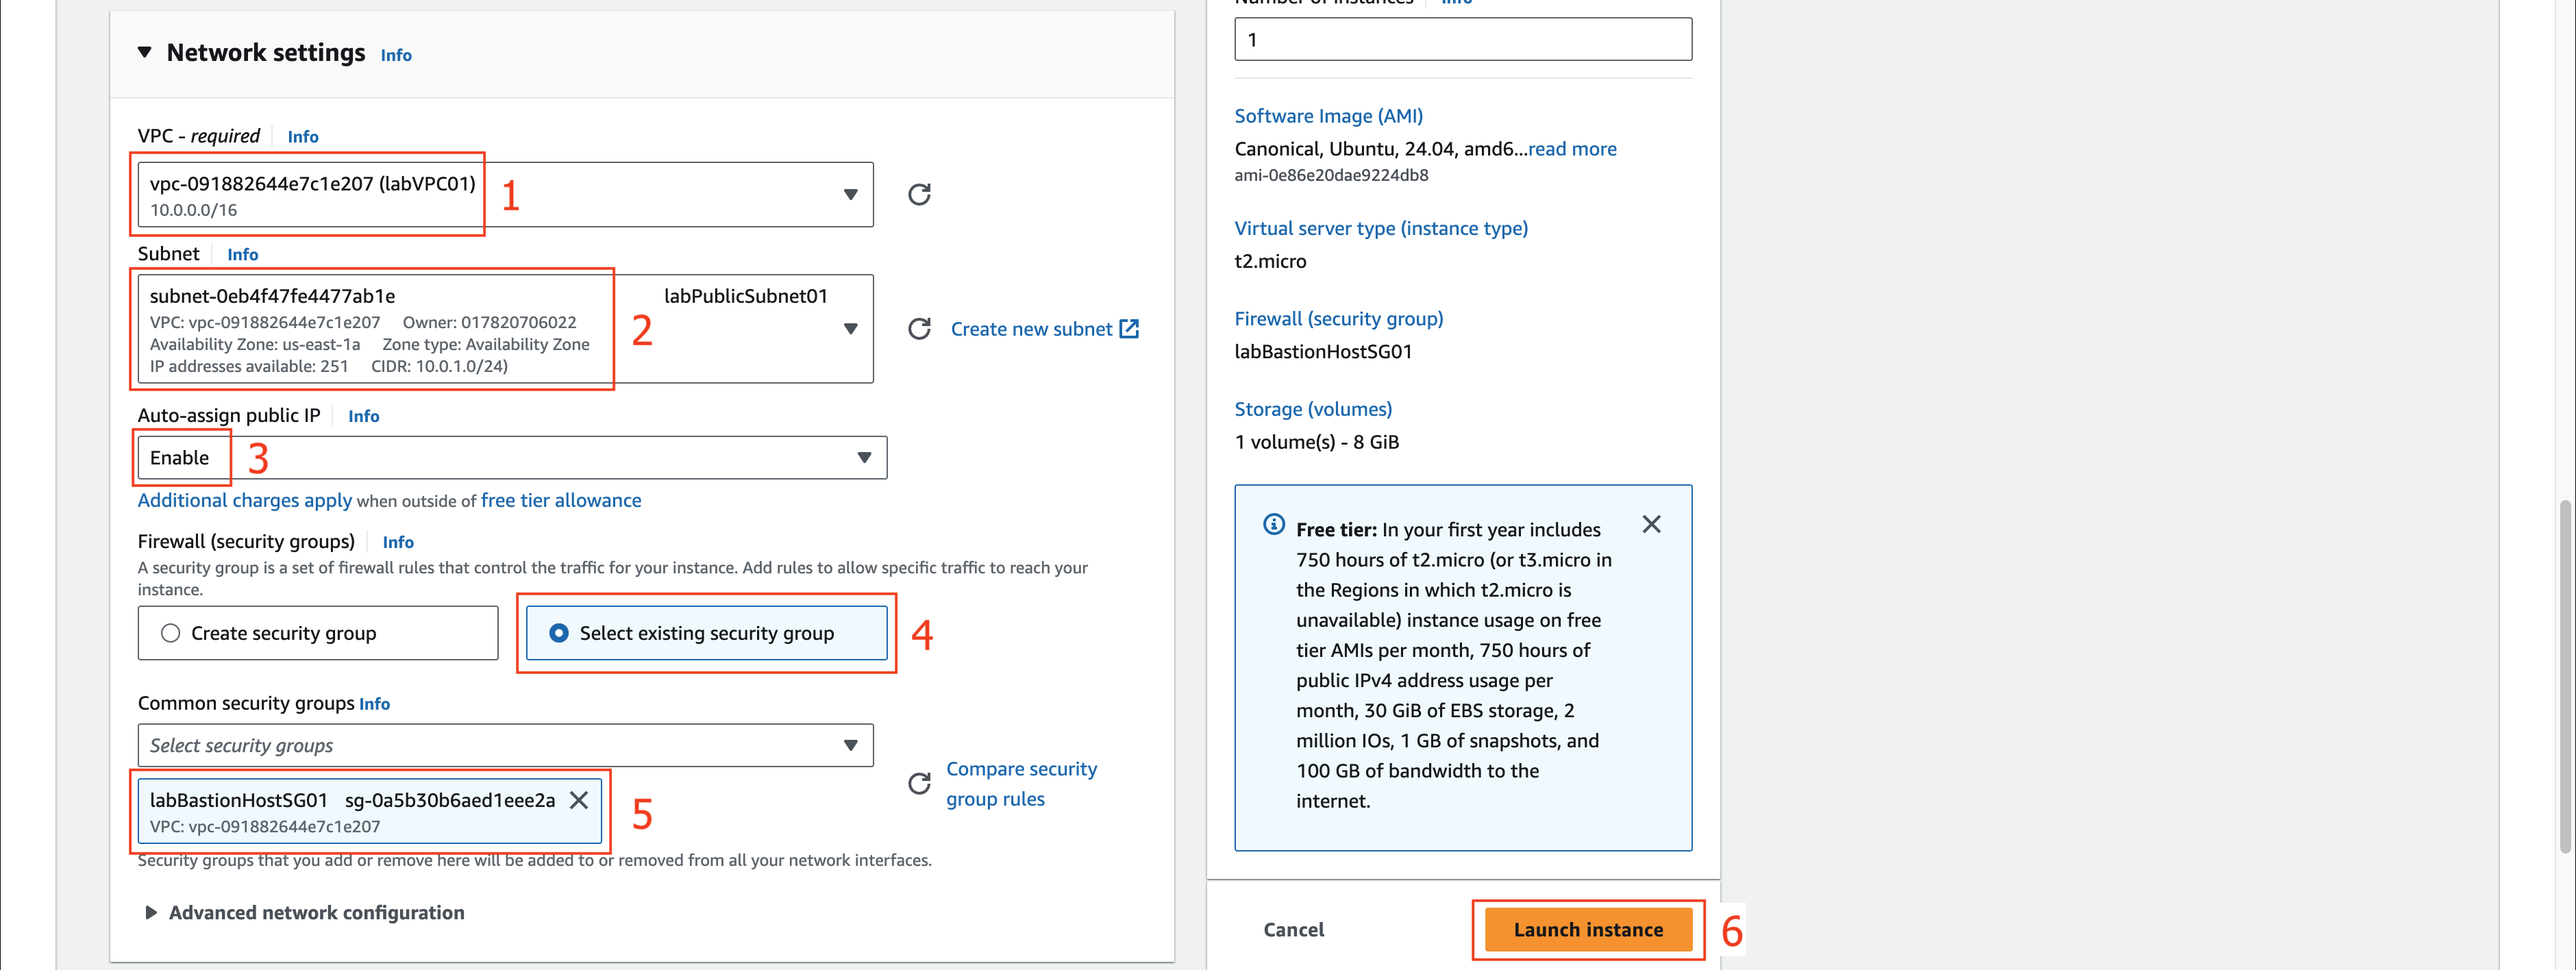
- At the Network settings section.
- Click the Edit button.

- At the Edit sections.
You need to choose labPublicSubnet01 subnet which we allow Enable auto-assign public IPv4 address on that subnet when creating VPC before.
- Choose labVPC01 on VPC - required field.
- Choose labPublicSubnet01 on Subnet field.
- Choose Enable on Auto-assign public IP field.
- Choose Select existing security group on Firewall (security groups) field.
- Choose labBastionHostSG01 on Common security groups field.
- Click Launch Instance button.

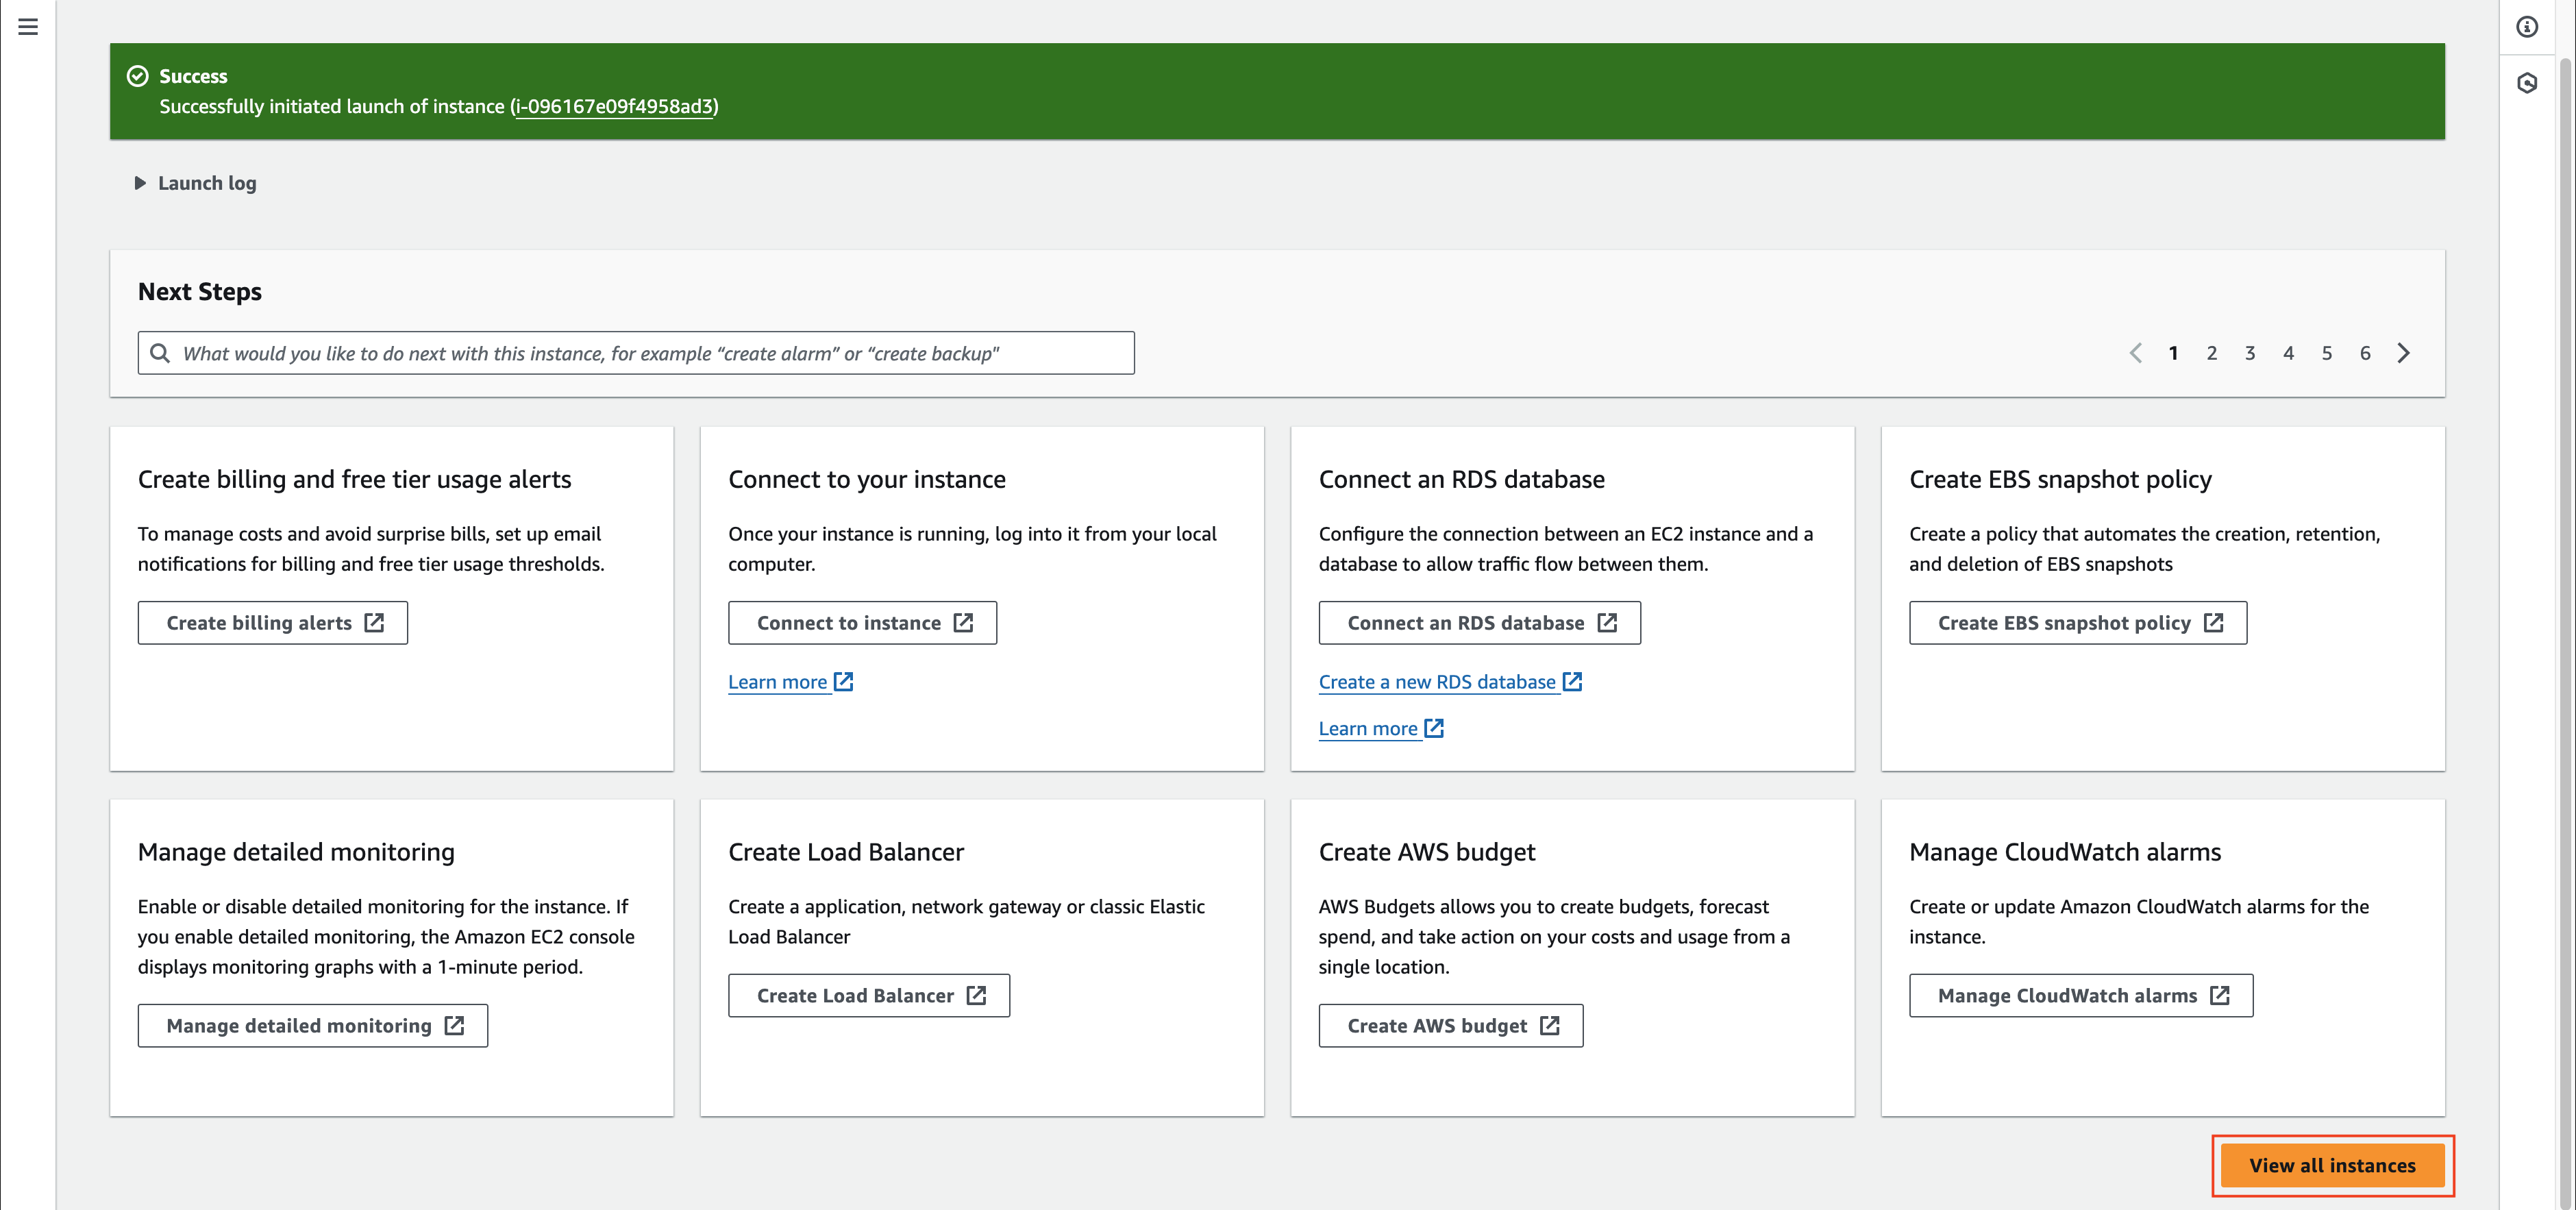
- Click View all instances to return to the list of EC2 instances.

Next, we will configure our EC2 linux bastion host.